
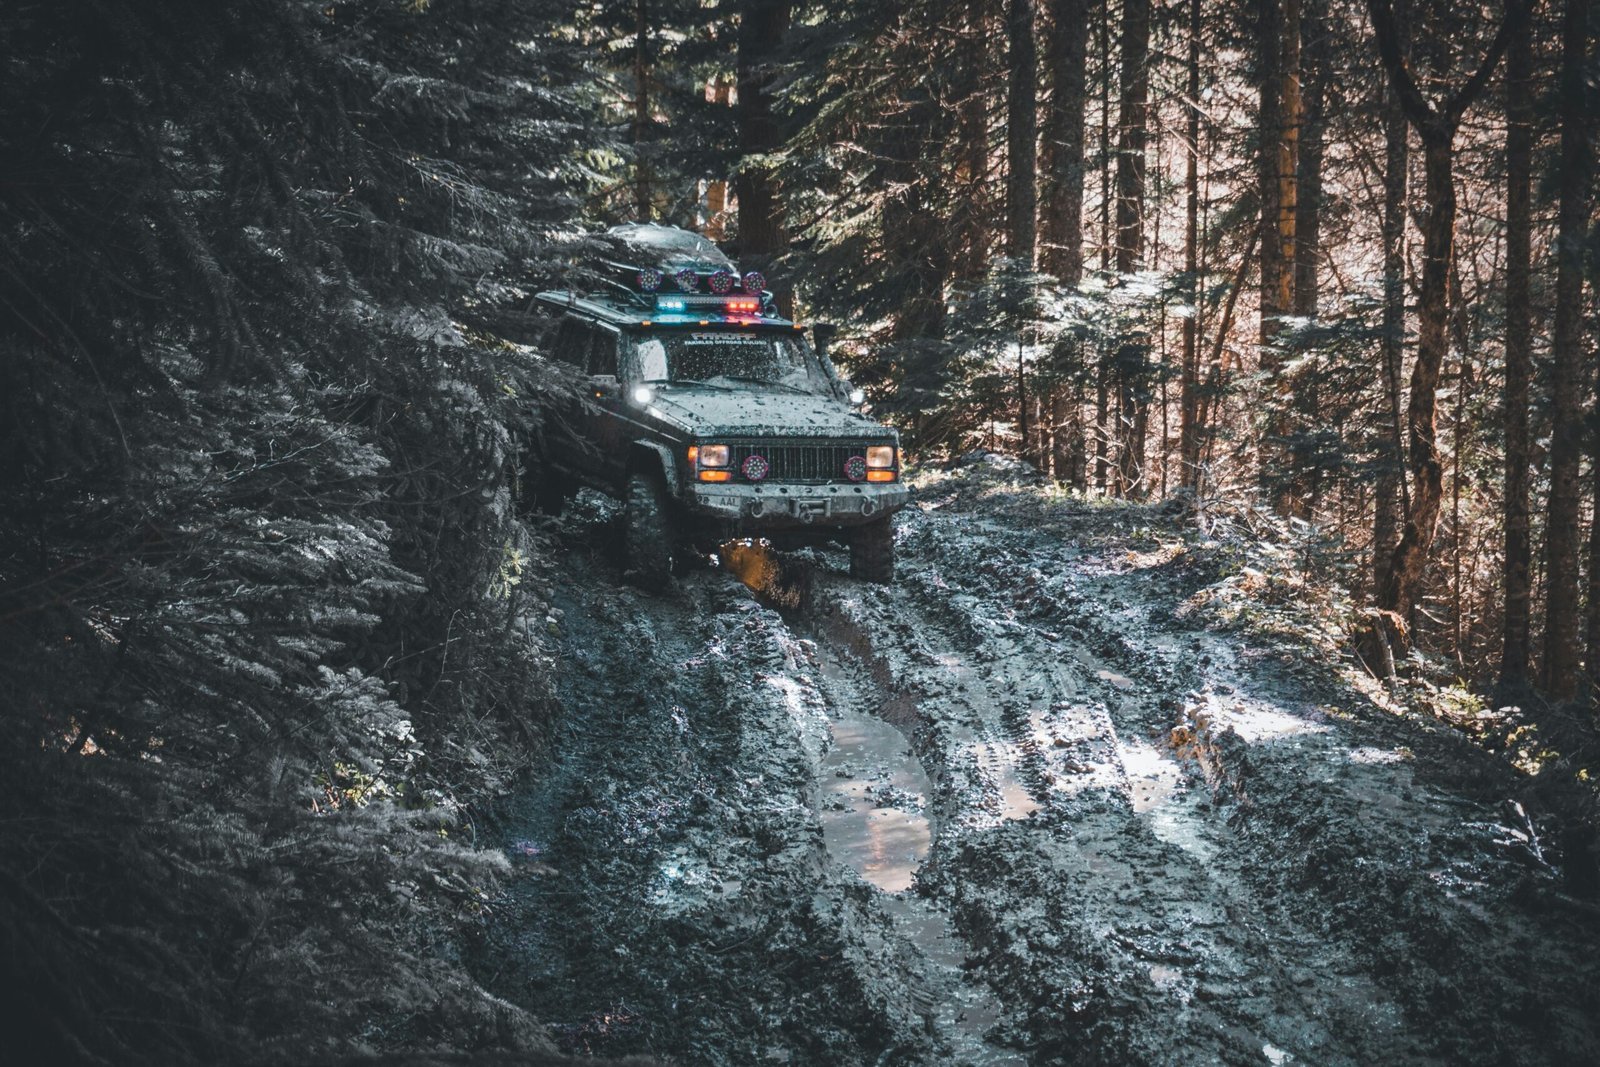
Getting stuck is rarely the real problem. Turning a recoverable situation into a damaged vehicle, or injured participant is the real danger.
For anyone learning 4×4 overland off-road recovery, the most important principle is surprisingly simple: start with the lowest-force solution available.
Experienced expedition drivers do not begin with winches or aggressive snatch recoveries.
They begin by understanding why the vehicle lost traction, whether mobility can be restored through tyre pressure changes, differential locks, low-range gearing, terrain modification, or traction boards.
Recovery is a decision-making process before it becomes a technical process. The objective is not merely to free the vehicle but to restore movement safely while minimizing risk to people, equipment, and the expedition itself.
Related Overland Journals
Overlanding in India: Choosing Your Vehicle, Format, and Road
Off-Road Overland Expedition: How to Tour Like an Expert
Overland Expedition: Circuits & Routes
Check out Other Field Notes Journals: Explore Adventure, Wellness, Culture and Wildlife
Why Recovery Is About Decision-Making, Not Force
Recovery capability is the defining feature of the 4×4 overland discipline. Understand the techniques before you need them. Practise them before the expedition circuit.
The assessment first principle
Every recovery operation begins with assessment, not action. Before engaging diff lock, before attaching a strap, before activating the winch:
- Exit the vehicle. Assess the situation from outside.
- Identify what the vehicle needs to do to become unstuck: direction of movement, distance, obstacle or resistance.
- Identify what is available as an anchor, a recovery surface, or a second vehicle.
- Select the minimum-force recovery method that will achieve the objective.
- Brief everyone present on their role before beginning. Nobody stands near a recovery line under tension.
The most common recovery error is escalating to maximum-force recovery (winch, ground anchor, full rigging) before attempting minimum-force options (traction boards, differential lock, reduced tyre pressure, passenger exit to reduce weight).
Minimum-force recovery is faster, safer, and less damaging to the vehicle.
Skills Table
| Skill | Why It Matters |
|---|---|
| Line selection | Prevents recovery situations |
| Low-range operation | Maximizes vehicle control |
| Tyre pressure management | Improves traction |
| Recovery systems | Enables self-sufficiency |
| Navigation | Prevents route errors |
| Field repairs | Reduces expedition-ending failures |
Recovery Gear: The 4×4 Specific Kit
Recovery gear is the category that most distinguishes 4×4 overlanding from every other vehicle format.
Carry what you can use. Learn to use everything you carry.
Recovery gear that has not been practised is dangerous, a misused snatch strap or a poorly rigged winch causes injuries.
Snatch Strap (kinetic recovery rope)
The first recovery tool in any 4×4 kit.
A snatch strap is an elastic nylon rope designed to store kinetic energy; the recovering vehicle builds momentum, the strap stretches and then releases, transferring an impulse that unsticks the stuck vehicle.
Key specifications:
Rated to at least 1.5x the gross vehicle weight of the heaviest vehicle in the group (for a 2,200kg Thar, minimum 11,000kg rated strap); length 9m minimum.
Do not use a tow rope as a snatch strap;
A non-elastic rope used as a snatch transfers all the kinetic energy as a sudden jerk rather than a progressive pull, which snaps equipment and injures people.
Shackles (bow shackles and D-shackles)
Used to connect recovery straps to recovery points, to each other, and to winch lines.
Carry a minimum of four: two bow shackles (for connecting straps to recovery points) and two D-shackles (for connecting straps to each other in an extension).
All shackles should be rated to match or exceed the strap’s rating. Secure the pin with a figure-8 of wire or a mousing wire to prevent it backing out under load.
Traction boards (MaxTrax, TRED, or equivalent)
Placed under a spinning or sinking tyre to provide a grippy surface for extraction.
Effective in sand, mud, and light snow. Less effective on rocks.
Carry two minimum; four for sand-heavy circuits.
Know how to dig out around the tyre before placing the board; boards placed under a tyre that has dug into a pit do not work.
Hi-Lift Jack
A mechanical jack used for vehicle recovery, tyre changes on soft ground (where a standard jack sinks), and as a base for other recovery operations.
Rated at 3+ tonnes. The Hi-Lift requires practise before use.
It is not intuitive and has specific load-bearing and handle operation techniques that prevent injury.
Carry a Hi-Lift base (a square of thick plywood or a purpose-made base) for soft surface use.
Winch (if fitted)
A vehicle-mounted electric or hydraulic winch is the highest-capability recovery tool available.
Rating: minimum 1.5x the gross vehicle weight of the heaviest vehicle in the group.
For a Thar with gear at 2,500kg total, a 9,500lb (4,300kg) rated winch is the minimum; 12,000lb is a better margin.
A winch requires: a quality synthetic or steel cable in good condition, a snatch block (to double the winch’s pulling power and change the pull angle), tree trunk protector (for anchoring to vegetation), and a recovery damper (a weighted blanket or bag placed over the cable to absorb energy if the cable snaps under load).
Winch operation is a specific skill; learn the correct rigging configurations and anchor selection before using it in the field.
Ground Anchor
For winch recovery without a fixed anchor point (a tree, another vehicle, or a rock formation), a ground anchor – a spade driven into the ground at the correct angle to resist the winch load, provides the alternative.
Correct use requires understanding the soil type and the load direction.
Recovery Damper
A heavy canvas bag or purpose-made damper placed over a winch cable or snatch strap at the midpoint during any recovery operation.
If the cable or strap fails under load, the damper absorbs the energy and prevents the terminal hardware (shackles, hooks) from becoming a projectile.
Always place a recovery damper. Always stand clear of any recovery line under tension.

Recovery Techniques: Order of Min to Max Force
Differential lock engagement
The first technique to attempt on a vehicle losing traction on technical terrain. Engage the rear differential lock first; if insufficient, engage front.
The diff lock removes the open differential’s tendency to send power to the spinning wheel and delivers power equally to both.
Diff lock should be engaged before the problematic section, not during it.
Engaging a diff lock on a moving, slipping vehicle can damage the locking mechanism on some systems.
Drive in diff lock at speeds below 30km/h and disengage before returning to conditions where the steering needs to turn freely.
Low-range transfer case
Engage low-range for sustained technical sections: steep climbs, rock obstacles, slow-speed water crossings.
Low-range multiplies torque at the wheels by a factor of 2–4x (depending on the low-range ratio), allowing the vehicle to move through extreme terrain at walking pace with full mechanical control.
In low-range, use engine braking on descents rather than brakes; select a gear that maintains engine braking throughout the descent without requiring constant brake application.
Tyre pressure reduction (airing down)
Reduce tyre pressure to 20–22 PSI for sustained gravel; 16–18 PSI for rocky technical terrain; 12–14 PSI for sand.
Lower pressure increases contact patch, improves grip, and allows the tyre to conform around obstacles rather than bouncing off them.
Always re-inflate to correct pressure before any section above approximately 40km/h;
A dramatically under-inflated tyre at highway speed is a blowout risk. Carry a compressor that can fully inflate an AT or MT tyre in under 10 minutes per tyre.
Traction board placement
Dig out the area around the spinning tyre before placing a board. The tyre needs to roll up onto the board, not spin into it.
Place the board in the direction of intended travel, flush with the tyre’s contact surface.
When the vehicle has moved onto the board, it will either drive off the board to freedom or stop with the board under the tyre, in the latter case, repeat from the next tyre back.
Single-vehicle snatch block extraction (self-recovery)
A winch rigged through a snatch block anchored to a fixed point allows a single vehicle to extract itself without a second vehicle.
The snatch block doubles the pulling force and allows the direction of pull to be changed.
The correct rigging sequence:
anchor the snatch block to the fixed point (tree, rock, or ground anchor) using a tree trunk protector and shackle;
attach the winch hook to the vehicle’s recovery point through the snatch block;
place a recovery damper on the winch line midpoint; engage the winch.
Never hold the winch hook. Never stand in line with any tensioned recovery line.
Two-vehicle snatch extraction
Vehicle A (stuck) attaches the snatch strap to its front or rear recovery point via a shackle.
Vehicle B (recovering) attaches the other end to its recovery point via a shackle.
Vehicle B drives away to take slack out of the strap, then continues forward, the strap stretches under tension and the kinetic energy is transferred to Vehicle A as Vehicle B reaches the strap’s elastic limit.
This is the fastest and most commonly used recovery on overland circuits.
Key discipline: Vehicle A must be in neutral, or in low-range forward, to benefit from the kinetic transfer, a vehicle in park or in high-range with brakes on will not extract; it will instead generate the maximum load on the strap and recovery points.
Winch extraction
The maximum-force tool. Used when other methods have failed or when the stuck vehicle cannot be accessed by a second vehicle.
Correct sequence: assess anchor options; rig snatch block if anchor is not in direct line with the direction of pull; use tree trunk protector on any vegetative anchor;
place recovery damper on winch line; rig a secondary safety line on the winch hook if available;
disengage the freespool clutch on the winch drum and pull the cable to the anchor point manually;
engage the clutch and begin winching at low speed; guide the cable onto the drum evenly;
stop and re-assess if the cable begins to layer unevenly or the anchor shows signs of failing.
Ground anchor for winch (no fixed anchor available)
Dig a trench at 45° to the vehicle’s direction of pull. Insert the safety shovel blade-down at the bottom of the trench with the handle horizontal.
Rig the winch hook to the shovel handle. The shovel blade acts as a deadman anchor.
Ground anchors work best in firm soil and sand. In soft mud or loose gravel, their holding capacity is reduced; use as a temporary solution to move the vehicle to a direction where a better anchor is available.
Self-recovery: Specific situations
High-centred on a rock obstacle: Vehicle’s undercarriage has grounded on a rock with one or more wheels lifted off the surface.
Actions: assess which wheel or wheels have traction; engage diff lock; attempt to drive off the rock at low speed with steering input toward the wheel with traction.
If this fails: use the Hi-Lift jack to lift the vehicle body enough to place rocks under the wheel that is hanging; lower the vehicle onto the rocks to restore ground contact.
If the rock is embedded in the undercarriage: the vehicle must be lifted clear. Hi-Lift from the rock slider or bull bar, with a second vehicle providing support if available.
River crossing stuck mid-stream: Do not stop in a river crossing if the engine is running and there is any forward momentum available.
If stopped mid-stream: assess whether the current is pushing the vehicle laterally; check depth around all four wheels from inside the cab (partially open the window from the upstream side, not the downstream side);
if the engine is running, engage diff lock and attempt to continue to the exit bank, not to reverse;
if the engine has hydrolocked (water ingestion through the air intake), do not attempt to restart; a hydrolocked engine restarted drives a water column through the combustion chamber and destroys the engine.
Recovery from mid-stream stall without water ingestion: allow the engine to clear, restart carefully, and drive out at minimal throttle.
Winch cable failure under load: If a winch cable or snatch strap fails under tension, the terminal hardware (hooks, shackles) becomes a high-velocity projectile.
This is the reason for the recovery damper placed at the midpoint of any line under tension, it absorbs the energy of a cable failure and prevents the hardware from reaching vehicle speed.
If you observe a winch cable showing significant damage (kinking, fraying, birdcaging on the drum) before a recovery: stop.
Do not continue the recovery with a damaged cable. Rerig using a snatch strap as a secondary line if available.
Emergency Protocols
Two-vehicle minimum standard
For any circuit above R3, the community standard is a minimum of two vehicles.
A solo 4×4 in a recovery situation without a second vehicle is limited to self-recovery techniques.
Some situations – a vehicle inverted on a side-slope, a vehicle submerged in a river, a vehicle high-centred beyond Hi-Lift reach, are not recoverable without a second vehicle or external equipment.
Radio or Satellite communication
Garmin inReach Mini 2 or equivalent. Highly recommeded for any R5 circuit.
Set a daily position ping schedule before departure. Include your circuit’s key GPS waypoints in your filed trip plan so that a rescue team can assess your likely position from your last ping.
Mechanical failure decision tree
Can the vehicle be made mobile in under 2 hours with available tools and skills?
If yes: repair and continue.
If no: is the current position safe (not in a river, not on a narrow road with no berm, not in a deteriorating weather window)?
If safe: remain with the vehicle and call for help.
If not safe: move all occupants and essential kit to a safe position, mark the vehicle’s GPS coordinates, and contact emergency services via satellite communicator.
Attempting to walk out from an R5 circuit is the option of last resort – the vehicle is visible to rescue from the air; a person on foot in Himalayan terrain is significantly harder to locate.
Trail toolkit: field fixes in 30 minutes
| Item | Purpose |
|---|---|
| Tyre plugs (20+), cement, insertion tool | Tubeless puncture repair; AT and MT tyres are more susceptible to sidewall punctures on rocky terrain |
| 12V portable compressor (quality; rated for AT/MT tyres) | Re-inflate after puncture repair or after airing down; a compressor that takes 30 minutes per tyre is useless in the field |
| Tyre deflator (4-way or individual screw-type) | For airing down to correct pressure before technical terrain |
| Tyre pressure gauge (mechanical, quality) | Accurate pressure management |
| Jump starter (lithium; 12V; 600A minimum) | Cold-start failure on a remote circuit is common; a 600A minimum handles the higher compression diesels in the 4×4 segment |
| Traction boards (2 minimum) | Soft terrain extraction |
| Hi-Lift jack + base plate | Tyre changes on soft ground; vehicle recovery |
| Snatch strap (rated; 9m minimum) | Primary recovery tool for two-vehicle extraction |
| Shackles (4; rated) | Connecting recovery gear to recovery points |
| Recovery damper (2) | Safety on all recovery lines under tension |
| Multi-tool | Pliers, blade, screwdrivers, saw |
| Torque wrench (compact) with socket set | Post-recovery fastener check; wheel nut tightening after tyre change |
| Duct tape (heavy duty, 10m) | Emergency repairs across all categories |
| Cable ties (30+ mixed sizes) | Structural temporary repairs |
| Safety shovel (folding; military spec) | Digging out around tyres before traction board placement; ground anchor deployment |
| Tow rope (rated, separate from snatch strap) | Flat towing to safety; not for kinetic recovery |
| Warning triangles and LED flares | Breakdown visibility; mandatory before any roadside work |
Field repair kit: fixes that get you moving
| Item | Purpose |
|---|---|
| Spare drive belt(s) | Engine-stopping failure; know the belt routing for your engine |
| Radiator hose repair tape (self-amalgamating) | Emergency hose repair for minor splits |
| Coolant (2 litres, correct type) | Top-up after leak or boil-over at altitude |
| Engine oil (2 litres, correct grade) | Top-up for unexpected consumption on hard mountain climbs |
| Transfer case fluid (correct spec) | For transfer case inspection or top-up after a suspected leak |
| Differential oil (front and rear, correct spec) | A weeping diff seal can be topped up; a blown seal requires a workshop |
| Brake fluid (200ml, correct DOT rating) | Hydraulic system top-up; do not mix ratings |
| Hydraulic jack seals and fluid | For vehicles with hydraulic jack systems |
| Spare fuse set (full assortment for your vehicle) | Electrical system fault management |
| Wire connectors and electrical tape | Field wire repair |
| JB Weld (two-part epoxy) | Emergency metal repair — cracked bracket, broken mount |
| Threadlock (Loctite blue and red) | Re-securing fasteners that vibration has worked loose |
| WD-40 penetrant and contact cleaner | Seized fasteners; electrical connection cleaning |
Consumables
| Item | Quantity for a 2-week expedition |
|---|---|
| Engine oil (correct grade) | 3 litres |
| Transfer case fluid (correct spec) | 500ml |
| Differential oil front and rear (correct spec) | 500ml each |
| Coolant concentrate | 1 litre |
| Brake fluid (correct DOT) | 200ml |
| Power steering fluid (if hydraulic) | 200ml |
| Penetrant spray (WD-40 or equivalent) | 2 aerosols |
| Contact cleaner (electrical) | 1 aerosol |
| Tyre repair cement (tubeless) | 2 tubes |
| Duct tape (heavy duty) | 10m roll |
| Self-amalgamating tape | 5m roll |
| Cable ties (heavy duty + mixed) | 40+ |
| Safety pins | 20 |
| Threadlock (Loctite blue) | 2 tubes |
| Disposable gloves (nitrile; 20 pairs) | Field work without wound contamination |
| Hand cleaner (waterless, automotive) | Post-recovery field cleaning |
Frequently Asked Questions
What is 4×4 off-road recovery?
4×4 off-road recovery is the process of restoring mobility to a vehicle that has become stuck, immobilized, or unable to proceed because of terrain, traction loss, mechanical limitations, or environmental conditions.
What should I do first when my vehicle gets stuck?
The first step is to stop spinning the wheels and assess why traction was lost. Many recoveries can be solved using differential locks, low-range gearing, tyre pressure reduction, or traction boards before more aggressive methods are required.
What is the safest recovery technique?
The safest recovery technique is usually the one requiring the least force. Recovery should progress gradually from traction improvements and self-recovery methods to winching and kinetic recoveries only when necessary.
When should differential locks be used?
Differential locks should be engaged before entering technical terrain where traction loss is expected. They help distribute power more evenly across the axle and reduce wheel spin.
What tyre pressure should I use for recovery?
Pressure depends on terrain. Gravel, rocks, and sand all require different pressures. Lowering tyre pressure increases the contact patch and improves traction but tyres must be re-inflated before highway driving.
What are traction boards used for?
Traction boards provide an artificial gripping surface beneath tyres that have lost traction in sand, mud, snow, or loose terrain. They are one of the most effective self-recovery tools available.
When should a winch be used?
A winch should generally be considered after lower-force recovery methods have failed or when a second recovery vehicle is unavailable. Proper anchor selection, rigging, and safety procedures are essential.
Why is a recovery damper important?
A recovery damper helps absorb energy if a winch line or snatch strap fails under tension, reducing the risk of hardware becoming a dangerous projectile.
Is solo recovery safe?
Certain self-recovery situations can be managed safely, but many severe recovery scenarios become significantly more difficult without a second vehicle. For remote circuits, two vehicles are generally considered the minimum standard.
What recovery equipment should every expedition vehicle carry?
A basic recovery kit should include traction boards, recovery straps, shackles, tyre repair equipment, compressor, recovery damper, shovel, and essential vehicle tools.